Cheap & Easy High Temperature Foam Foundry Insulation
After the success of my foundry build, I made good use of it, melting metals using my home made oil burner. The problem came, however, one particularly cold day when I struggled to light my burner. After much head scratching I realised that my foundry was losing heat too quickly.
The refractory I used to make the foundry is excellent for remaining stable at high temperatures but unfortunately very good at retaining heat. When you’re trying to raise the ambient temperature by several hundred degrees, it’s surprisingly important to prevent heat loss.
This was not something I had previously thought about as my previous plaster foundry had no such trouble (plaster is a good insulator – just hopelessly unstable). So I did what most of us would do and turned to the Internet.
This was looking expensive…
Costly
Shop bought insulation for such projects is very expensive and takes the form of thermal blankets or blocks. I didn’t fancy either and particularly didn’t like the costs. So I pondered on a cheaper solution.
Not So Costly
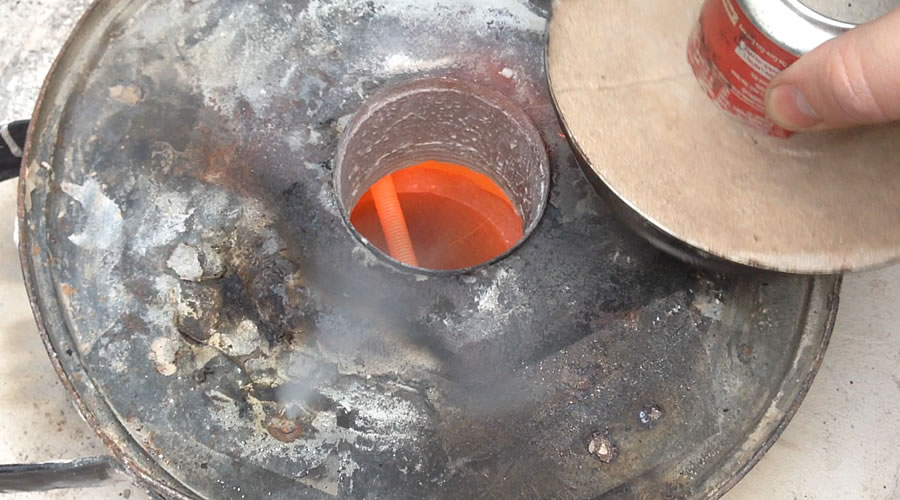
I originally came up with a spray foam insulation technique which did work and was pleasantly cheap. But unfortunately after just a few outings it began to fail on me, so I needed something else that ticked all the boxes.
Then I took a step back… what did I just say? “Plaster is a good insulator – just hopelessly unstable.”
That was the answer – plaster – but instead of using plaster as a foundry lining, where it invariably falls, I reasoned it was possible to surround the walls of my stable, high temperature refractory.
Nasty Shock
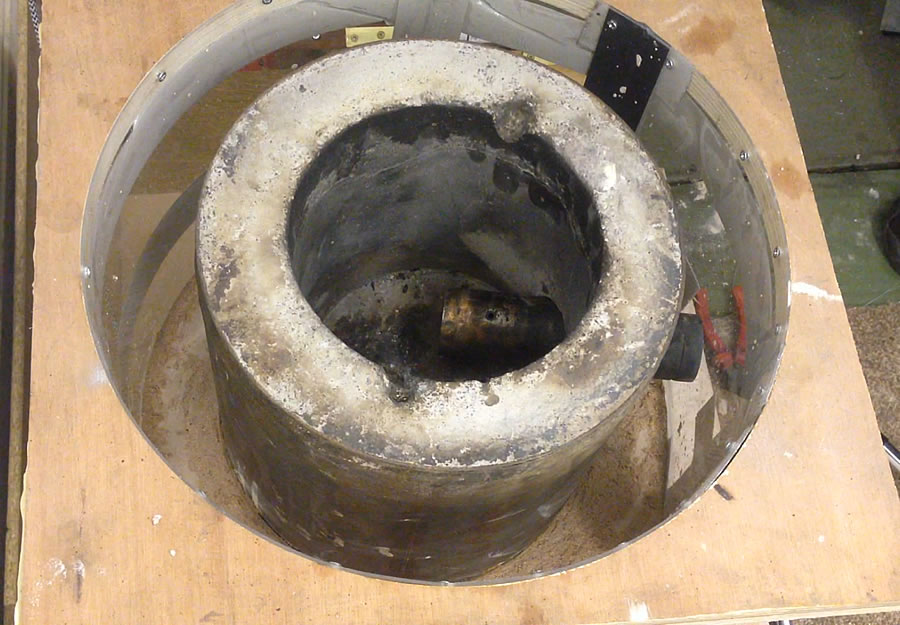
So I stripped the foam from my foundry, which was way too easy, and got a real shock. I undid the bolt that held on the base board and I was very surprised to see the state of the plywood beneath. One inch of plywood was all be ash and I could easily pull it apart.
Dangers of an uninsulated base
This is clearly a safety concern. If your base isn’t insulated you could have molten metals spilling on your feet. Deadly! This means that it’s critical to insulate the base of your foundry. Learn from my mistake here please guys. It’s too dangerous not to.
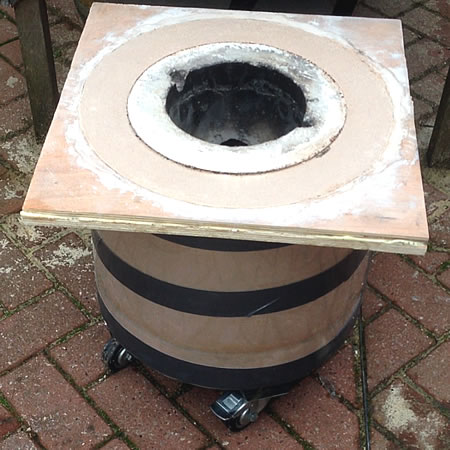
The Base
I had to rebuild the base so I took some pieces of half inch plywood I had lying around and glued them into a rough one inch thick square. Attaching my jigsaw to another scrap of plywood, I was able to make a simple compass jig. This allowed me to cut a pretty good circle from my plywood square that was two inches wider in radius that my foundry to give me a good layer of insulation.
I was able to reuse the wooden blocks and castors from the old base. Two of these wheels lock for safety and with plaster added to the foundry these wheels will be critical. It’s going to get very heavy.
Because of its weight, this foundry will have to live permanently outside. So I took the time to treat the wooden and oil the wheels and metalwork.
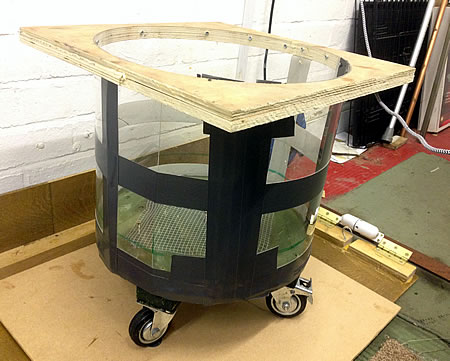
Perspex Mould – Not The Best Choice
I added a Perspex outer shell to the base, securing this with screws, in order to form a mould. The square off-cut from the base helped hold the Perspex in space at the top. I screwed it on a temporary basis but for some reason fell in love with it. Sounds daft I know, but I liked it there so I kept it, but it’s not strictly necessary.
To the base I screwed loosely some galvanized mesh to help bind the plaster.
A quick note about the guys… it was terrible! I thought it would mould nicely to a cylindrical shape and it initially did. Then without warning it cracked. The cracked again. It wasn’t cracking as I was shaping it, but after it was in place. Crazy.
I used strong duct tape to cover all the cracks add joins. I also wrapped it around the circumference of the Perspex to add strength as by now I was expecting more cracks.
I used Perspex as I wanted to be able to see plaster. I wouldn’t recommend it unless you can be sure the Perspex you source is good and strong. Pliable plywood or MDF would probably be better.
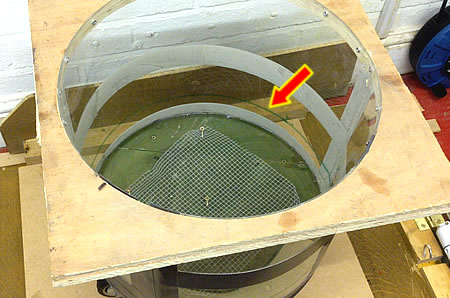
Green line shows eventual height of base board insulation
You can see at just above the base I’ve marked a line and this is two inches high. That’s the depth of the plaster insulation. I made sure everything was sitting fairly level to make pouring and levelling easier.
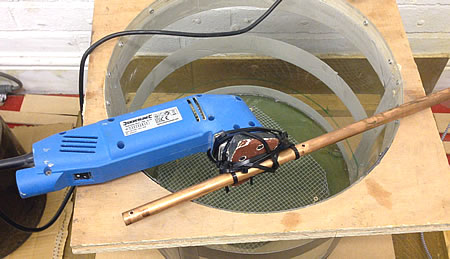
Vibration Tool
You may have seen me do this before. A simple electric sander makes a great vibration tool which is fantastic for levelling thick substances, like wet plaster. Here the copper pipe it simply clamped in place using half a dozen cable ties.
Cable ties, copper pipe and an electric sander make a great vibration tool
Which Plaster Is Best For You?
Now when it comes to the plaster mix, Grant Thompson’s 50/50 sand and plaster of Paris mix is probably ideal. Unfortunately here in the UK plaster of Paris is quite expensive in large quantities, but wet trades like Plastering are very common, so I opted for a large bag of Gypsum Thistle Hardwall. For sand I went with simple sharp sand.
I would advise you to get whichever type of plaster best suits your needs, your pocket or both. If Plaster Of Paris is cheap in your area, go for it. If it isn’t look to wet trades like plastering and see if you can buy a large bag from a building supplier.
Insulating The Base
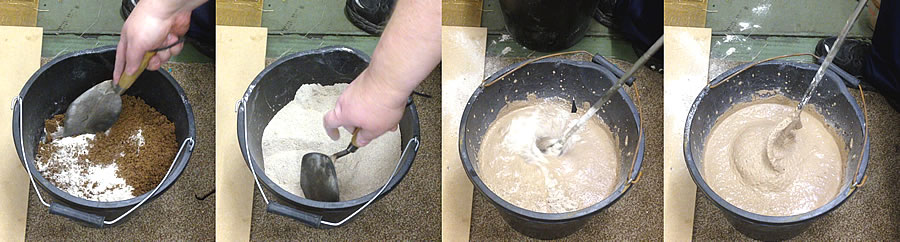
I calculated that I’d need roughly 9 litres of material to meet my 2 inch line and working on roughly 2 to 1 ratio of plaster to water, I added 3 litres of Hardwall and three litres of sand to a dry bucket and mixed this until it was a uniform colour.
I then added three litres of water to a second bucket. The trick with plaster is to add the plaster to the water and mix – not the other way around.
I used a paint stirrer in my drill and added to plaster mix bit at a time, mixing all the while. I ended end up with something a little too wet for a plasterer to use, but it would pour nicely.
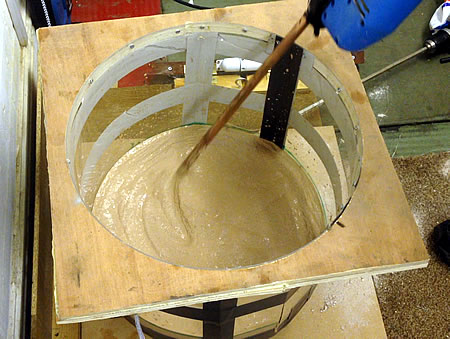
The vibration tool levels things out nicely
I poured the content in and prayed the Perspex didn’t crack again. The vibration tool worked wonders at this point, helping the thick plaster to settle outwards and level nicely.
Don’t Forget The Foundry
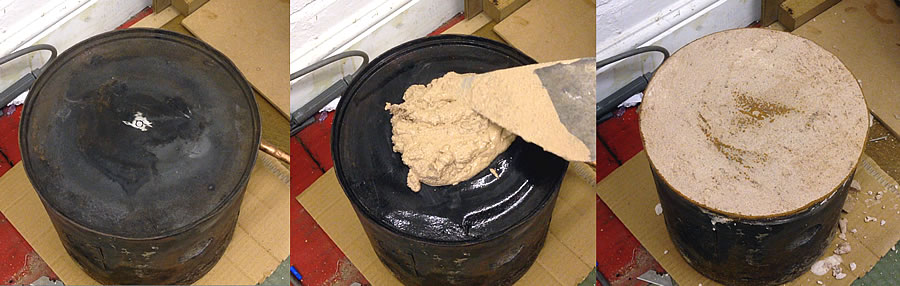
The base of the foundry has some voids that could be usefully filled. You’ll note I’ve cut away the bolt. It won’t be needed here.
The underside of the foundry has a void – best insulate this too
A little PVA was added to help things bond then the bucket was scrapped clean and the content was just enough to fill the voids. I levelled it roughly with a trowel and then a straight edge.
“Going Off”
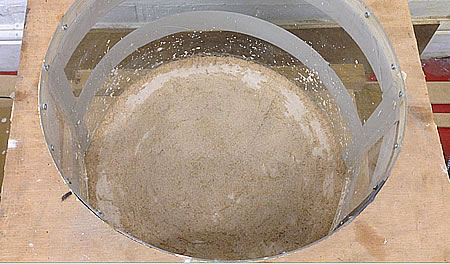
The plaster of Paris mix goes off very quickly. The Hardwall takes a couple of hours. The important thing is to wait until the plaster is going off (starting to firm up) and then use a straight edge to scratch the surface enough to make it nice and flat, as I’ve done here.
As the plaster goes off, the surface is scraped to create a flat face
Before Plastering The Sides…
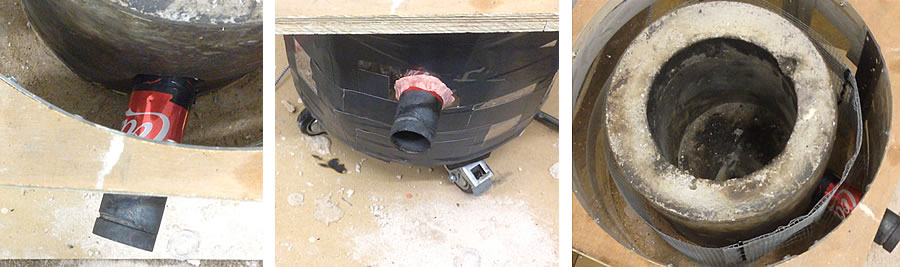
The following day, I lifted in the foundry and centred it as best I could. I needed to work out where to cut a hole for my burner to go so I placed a piece of steel pipe the same size as my burner inside the foundry. My plan was to heat the pipe and melt a hole through the Perspex. It didn’t work, but it did manage to crack it again!
Pipe within foundry – locates position for burner
So instead I used a blow torch and a heated a piece of steel bar and melted my way through from the outside. Finally being able to see through the Perspex became a useful benefit.
A good, hot soldering iron could be used for this same purpose.
Learning from my mistakes in the foundry build, I wrapped the pipe with a thin metal sleeve made from a soda can then I used ordinary plasticine around the pipe so wet plaster wouldn’t fall out.
The pipe was a good fit in the foundry so I wedged paper towels in an around the inside opening just in case but figured at most I’d get a little moisture. Plenty of tape covered the crack in the Perspex.
Soda can sleeve, plasticine, galvanised wire – all ready to pour
I then added some more galvanized mesh, positioning it roughly central.
Mix and Pour Some More
To avoid spilling plaster inside the foundry, I used the existing lid, mixed up some plaster and poured. It’s critical to use the vibration tool to avoid unwanted voids. Pay particular attention around the burner pipe.
Eventually I’d filled all the way to the top and shaking it gently helped everything settle in place and remove bubbles.
Again I waited for it to just start going off then I used a trowel to smarten the things up.
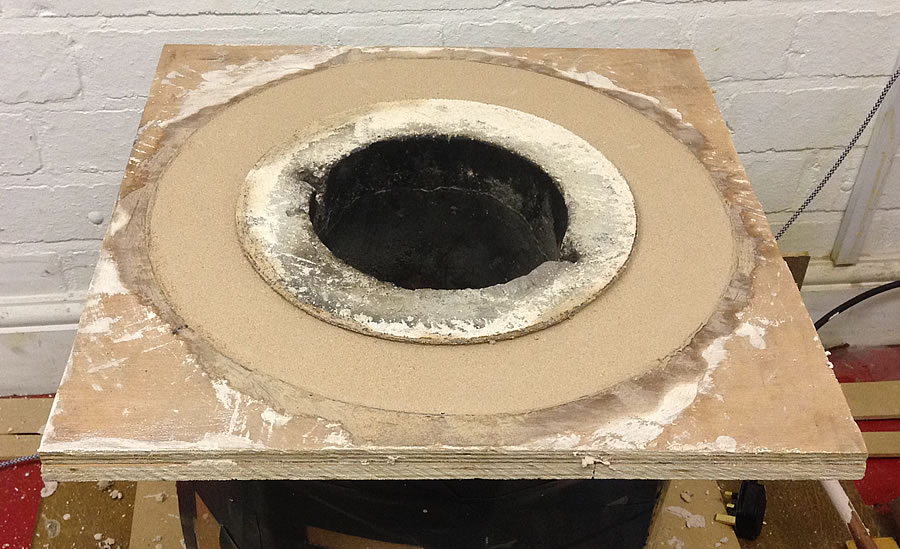
Don’t Forget The Lid
Heat rises, we all know that, so it’s important to insulate your lid, so I gave mine the same treatment.
I emptied out all the refractory, filled it half with plaster, and then topped it off with refractory. This created a good inch of plaster insulation but the part that faces the heat is stable refractory.
Drying and Priming
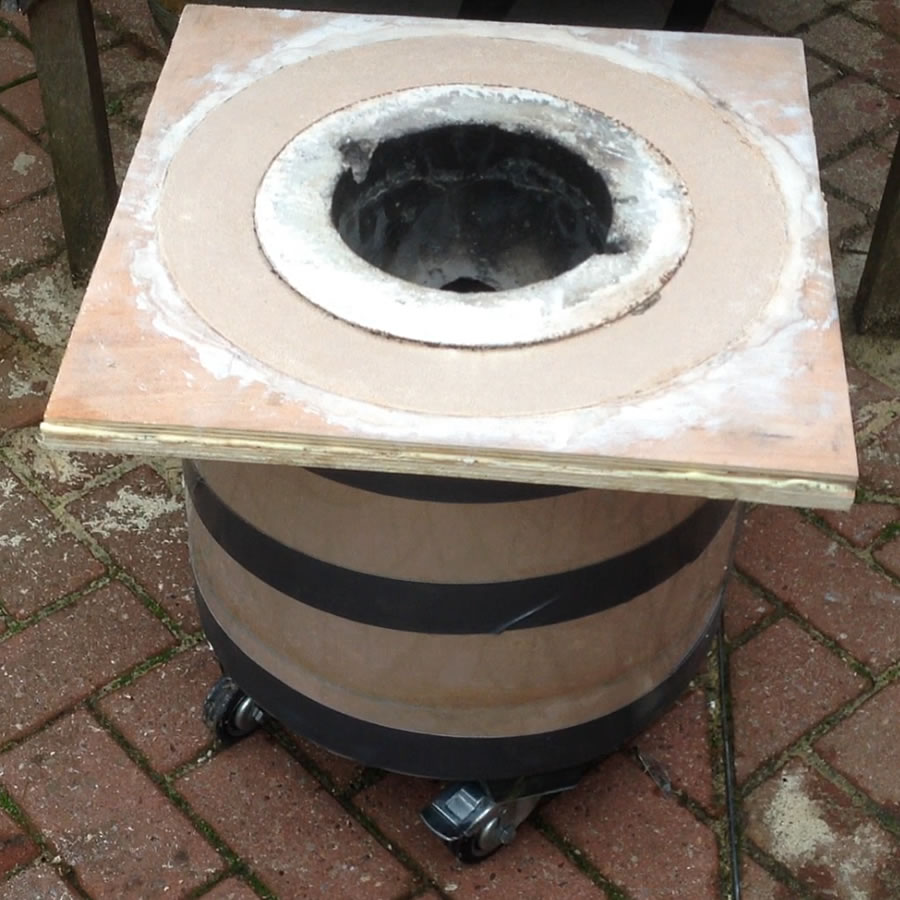
The following weekend I wheeled the now very heavy insulated foundry outside. Those castors made light work of it. I lit a small wood fire inside, fed the fire for half an hour or so, keeping it contained, then I let it burn out.
Heavy but mobile thanks to the castors
After that I added an ordinary bag of barbeque charcoal to the foundry, lit it and let that burn. After half an hour I added the lid and let the plaster cook.
It’s probably not necessary to take this long over drying the plaster. It’s just a personal preference. I prefer not to rush the process, but the choice is yours.
The following day I decided to heat things up further and used my gas burner on its lowest setting. There was evidence of condensation behind the Perspex and even water escaping gaps in the Perspex. In truth I think it good a good month or more for the plaster to truly dry out (if it ever has, being outside), but that didn’t stop it working an absolute treat.
Success
After an hour I decided to crank things up and give the plaster insulation a proper test. I placed my crucible inside and turned the gas up a few notches, but still not its hottest. Look at the insides…
… that’s a fabulous glow. The insulation works are treat.
What’s more, I could comfortably touch the sides of the foundry as well. It was warm to the touch, but not hot.
So why plaster?
Because it’s cheap, practical and really easy to do.
I think over time the plaster will crack up. Thankfully I don’t imagine this to be a problem. As long as the plaster is sandwiched between the outer surface, Perspex in my case, and the refractory, cracked or not it should still do its job. Sure a few hairline cracks are already visible on the surface, but so far everything is still in place and working well. If it doesn’t, you can be sure I’ll let you know right here. But for now, I’m very optimistic about this insulation.
If you have any questions for me, please drop me a line.
If you want to see my YouTube video on the subject and see me doing this in real time, simply click below:
Thank you for putting this in layman's teems. I've got no experience with electrical and other videos I've watched don't explain clearly why it works or doesn't.
“We rise by lifting others” - Robert Ingersol
If you'd like to offer a donation (and help me fund a few new projects), then please click the donate button below. Payments are handled securely by PayPal. For more information on why I have this button, click here.
Or... Become A Patron
Alternatively, if you can spare a little each month, consider becoming a Patron. Patron's make it possible for me to continue developing my YouTube Channel and my websites. Please CLICK HERE for more information.
 After the success of my foundry build, I made good use of it, melting metals using my home made oil burner. The problem came, however, one particularly cold day when I struggled to light my burner. After much head scratching I realised that my foundry was losing heat too quickly.
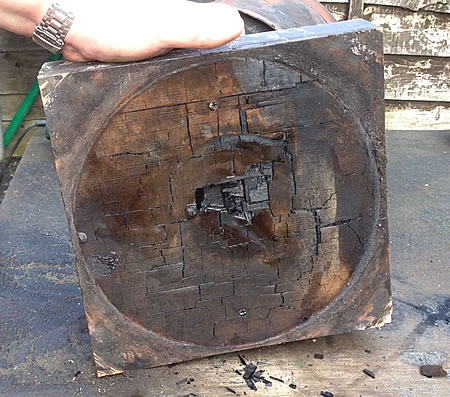

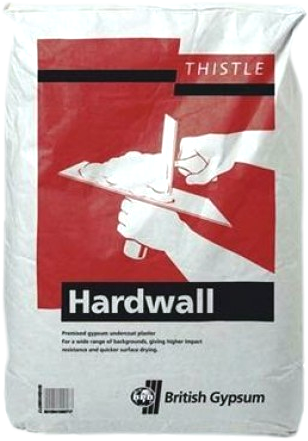 Now when it comes to the plaster mix, Grant Thompson’s 50/50 sand and plaster of Paris mix is probably ideal. Unfortunately here in the UK plaster of Paris is quite expensive in large quantities, but wet trades like Plastering are very common, so I opted for a large bag of Gypsum Thistle Hardwall. For sand I went with simple sharp sand.