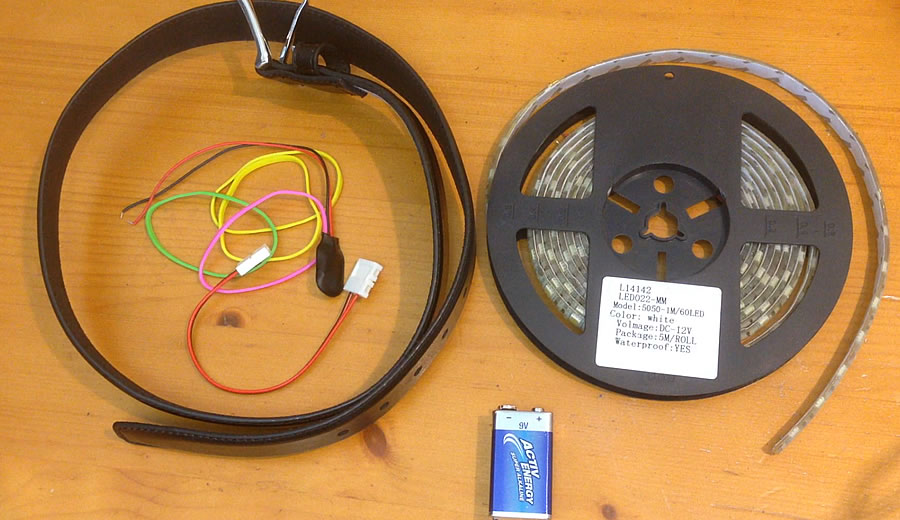
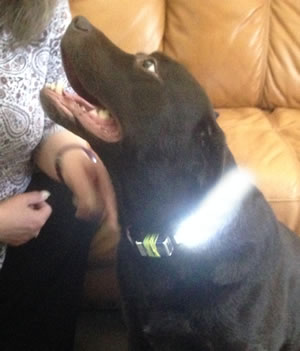
Walking a dog in the dark is always a risky thing, especially if your dog’s dark in colour like mine. An LED dog collar makes a lot of sense. So I decided to make one out of a few bits I’d got lying around.
Probably the only thing most folks won't have to hand is the LED strip. But once you've used this wonderful stuff, you'll probably always keep a roll.
It’s completely waterproof, flexible, comes in a variety of colours, works safely on up to 12 volts, has an adhesive backing tape and can be cut to length using ordinary scissors.
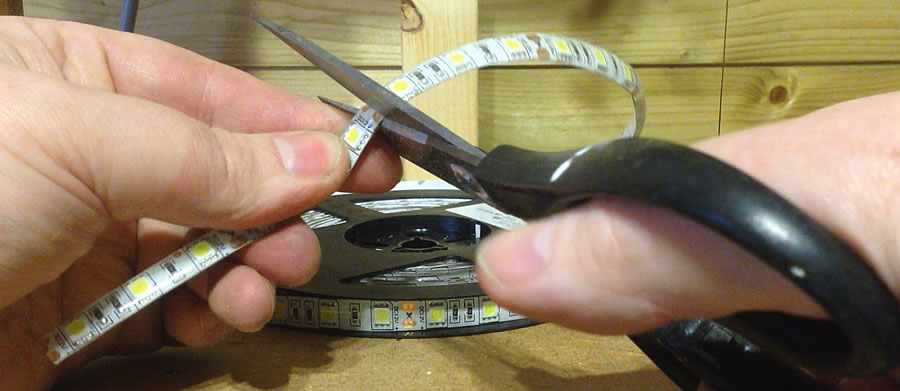
LED light strip - flexible and easy to cut
To start with I needed to measure the length of the collar and my dog was the obvious model for that. This enabled need to work out how where the hole for the belt buckle needed to be and this was easily poked through using a bradawl.
I roughly measured how much LED strip I needed based on the freshly trimmed belt and cut off the excess.
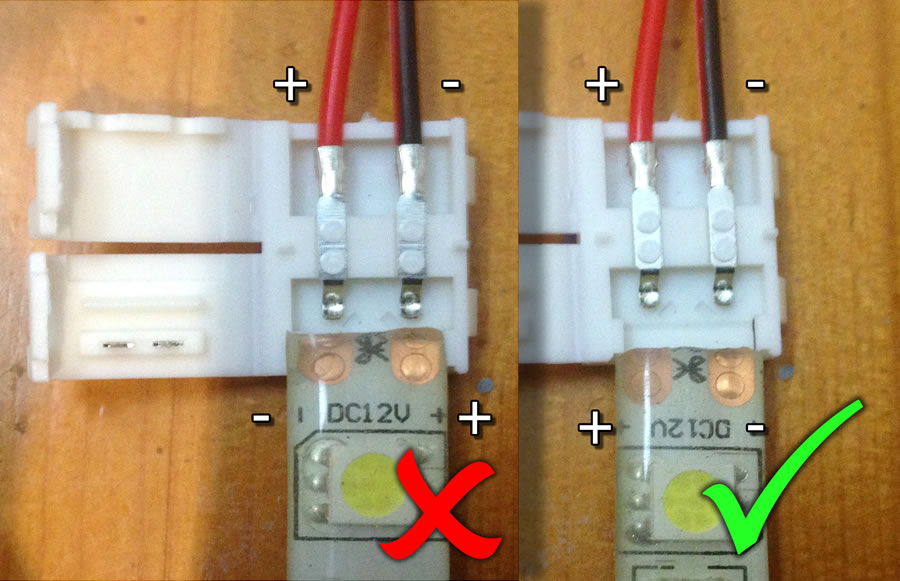
Polarity Importance
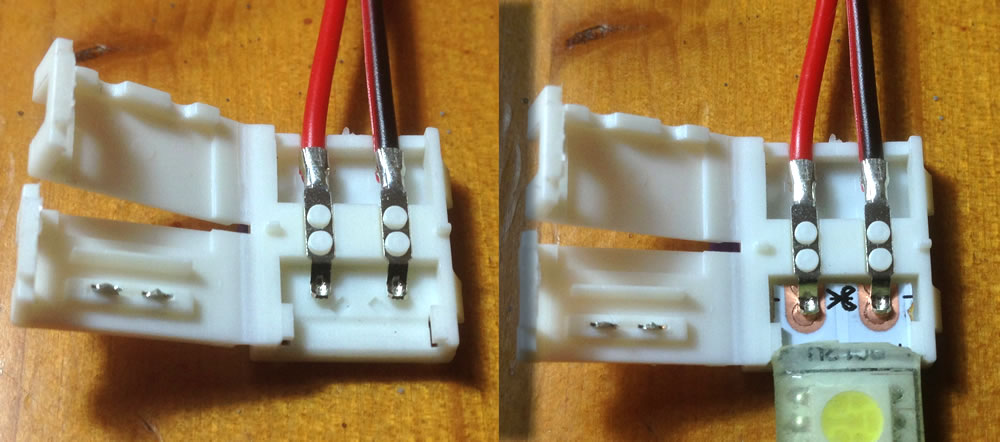
The LED connector pops open with a fingernail and reveal inside two wires and two metal lugs that need to come together with contacts inside the LED strip. The strip is marked for correct polarity so you must ensure the connector and strip marry up perfectly - positive to positive and negative to negative.
LED Connector - get the polarity right!
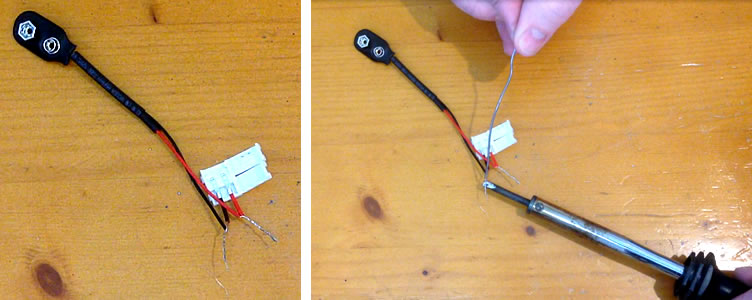
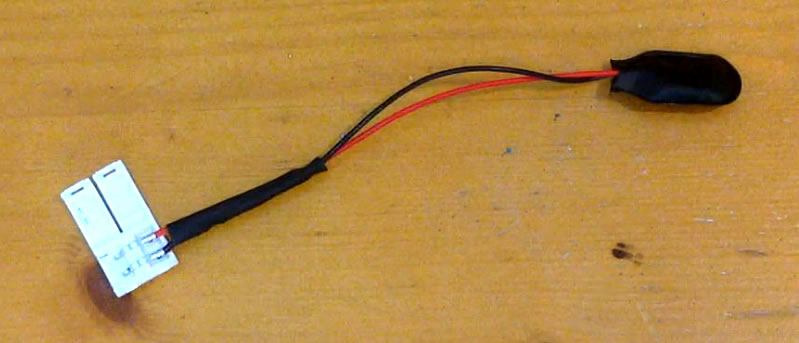
There's two connector blocks on a standard lead but only one is required. The other can be cut away. Leave around 25mm (an inch) of cable sticking out. This needs to be spliced to the battery connector cable.
You'll need to insulate your electrical connection to avoid shorting out the battery. Electrical insulation tape is fine but in this instance I opted for heat-shrink. This needs to be added before any wire joining takes place.
I stripped away a small portion of the outer wire sleeving to reveal the bare wires within, on both the battery and LED connector. It was then simply a matter of twisting the two reds together and then the two blacks.
Now you could leave the connection like this - with the wires just twisted together. A spot of adhesive could stop them unravelling along with the insulation tape or heat-shrink. But personally I prefer to use the belt and braces approach of a soldering iron.
First I clean the iron with a little fine sandpaper, then tin the tip with a spot of solder. The iron is then placed under the wires and the solder on top. The rise rises, melts the solder and this melt through the strands of wire forming a perfect join.
The heat shrink is then pulled down over the bare connections and the body of the iron shrinks these snugly in place.
This will achieve a good, sound connection.
The only awkward thing about this LED strip is the gel coating on top. I suppose there are different connectors available. I imagined the ones I purchased would have spikes that would pierce the gel and touch the copper contacts contained within. But this wasn't the case so instead I needed to scrape away the gel.
I sliced through very carefully with a sharp blade making sure not to damage the LED strip itself.
With that done the copper contacts are exposed and these slid under metal lugs contained within the connector strip. It's worth reiterating here the importance of getting the polarity right. Get it wrong and you'll likely damage your LEDs.
Plugging in the battery at this point proved the connections and LEDs to be working perfectly.
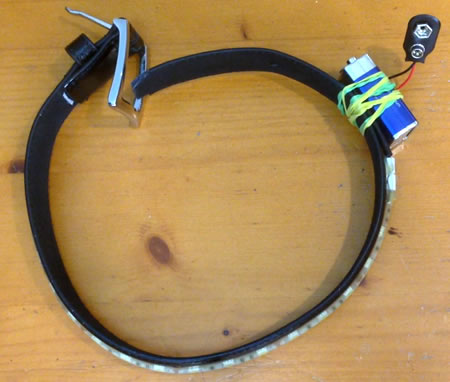
The position of the battery is determined by the belt buckle. All we need is a couple of rubber bands to hold the battery in place.
Using two makes sure it’s nice and secure.
The strip has an adhesive backing and it’s pretty good really, but it’s only as good as the surface it sticks to. So it’s important to clean the belt thoroughly. I used acetone but any good spirit or thinners should remove all grease and dirt.
The adhesive backing tape was then removed and the strip positioned onto the belt. It’s important to bend the belt as you’re doing this to maximise the surface area. If you straighten the belt, when you try to put it on your dog, it won’t work.
Press it firmly to ensure a good contact.
I find these connectors never lie flat and of course there's no adhesive tape, so I used a spot of hot glue to bond it in place. Similarly I've found in the past that the LED strips can pull free of the connectors, for I dabbed more hot glue inside the connector to prevent thin happening. It also makes things nice and waterproof.
If you don't feel the adhesive tape is strong enough, a good flexible adhesive like hot glue can be used to supplement the bond.
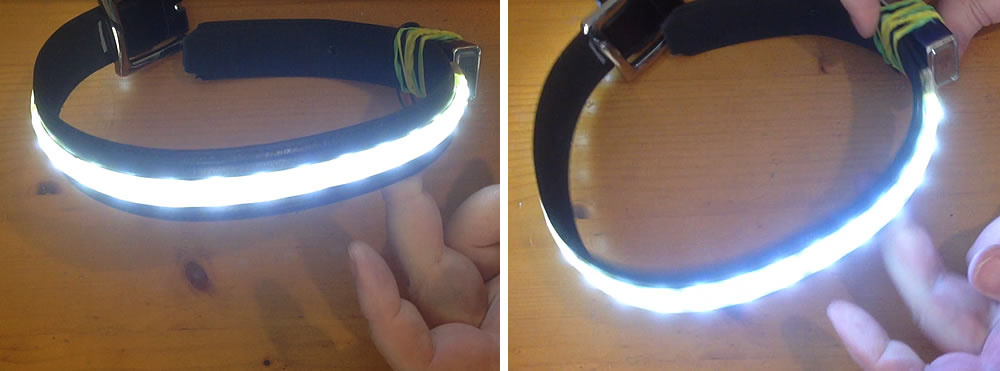
And that, believe it or not, is it. Simple, eh?
You'll find these look great and last for ages. Even if one or two LEDs stop working, the rest of the strip will carry on, and their low power consumption means the battery will last for a good number of dog walks.
Very well done and as usual your presentation is thorough and easy to understand. Thank you for this very useful information.
“Generosity is the best investment” - Diane Von Furstenberg
If you'd like to offer a donation (and help me fund a few new projects), then please click the donate button below. Payments are handled securely by PayPal. For more information on why I have this button, click here.
Or... Become A Patron
Alternatively, if you can spare a little each month, consider becoming a Patron. Patron's make it possible for me to continue developing my YouTube Channel and my websites. Please CLICK HERE for more information.
 Walking a dog in the dark is always a risky thing, especially if your dog’s dark in colour like mine. An LED dog collar makes a lot of sense. So I decided to make one out of a few bits I’d got lying around.