How To Make A Simple Archery Jig to Feather Arrows
I'm no champion archer, but I do enjoy a spot of archery and like to feather my own arrows. There’s plenty of fletching jigs out there on the Internet but none with quite my spin on things (forgive the pun).
Fairly typically, my jig contains two uprights with a slot that allows a clamp to place a feather on the arrow.
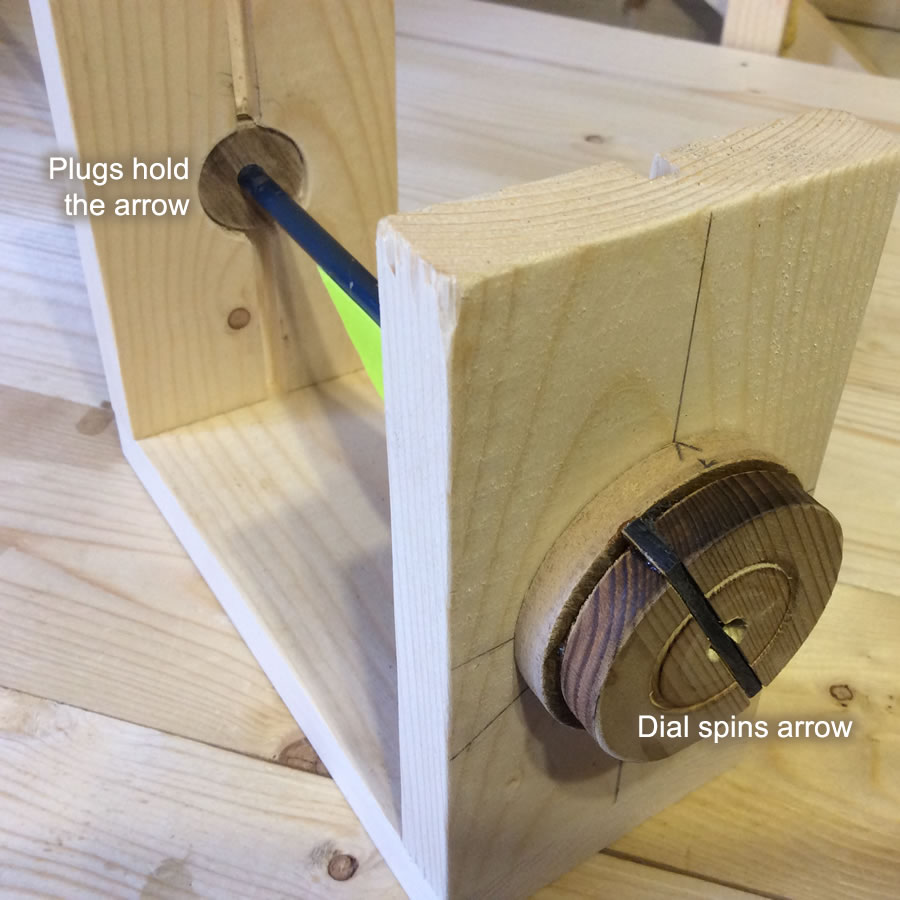
I think the main difference here is that my jig uses plugs that hold the arrow perfectly central to the axis of the arrow. A turnable dial allows for precise rotation of the shaft as the dial controls the nock. This means you can add two, three, four or however many feathers you prefer and be sure to align then straight every time. You can also offset your feathers by simply adjustment to the clamp, giving your arrows that extra spin.
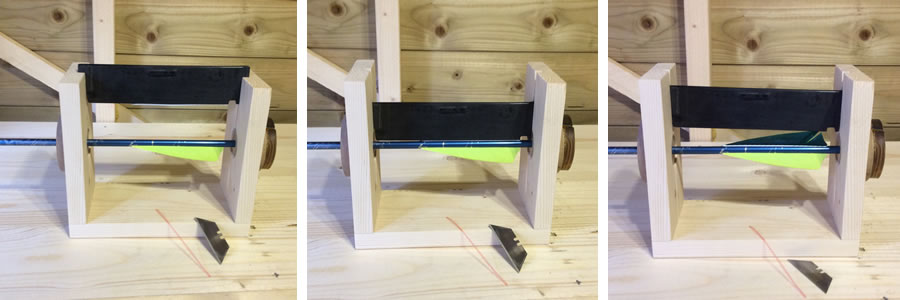
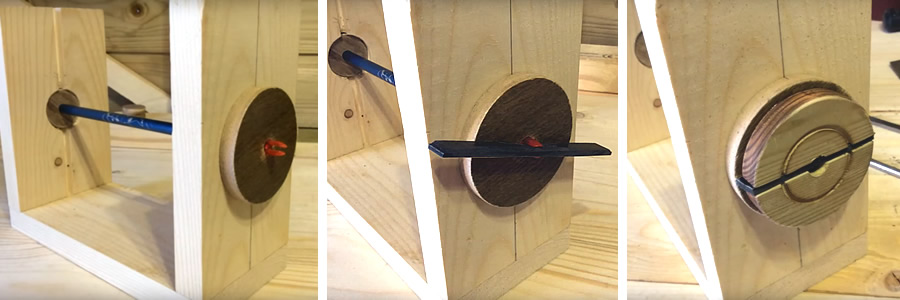
(1) Arrow in jig. Clamp containing feather is lowered. (2) Clamp contacts shaft. (3) Clamp raised leaving feather glued to shaft.The arrow is held within the jig by two plugs. One plug controls the nock and has a dial that can be turned to rotate the shaft to a precise angle.
How The Fletching Jig Works
The arrow is fed nock first through the holes in the vertical supports. The nock attaches to the dial-plug, gripping on to a plastic strip just like it would on the string. The other plug is fed over the point of the arrow and slid along the shaft until it comes to rest within the vertical support. The arrow is now fully supported within the jig. The dial can be turned to rotate the arrow and marked points on the dial make for easy location of the cock and hen feathers.
A feather is placed within the clamp (which is marked to enable controlled positioning) and adhesive tape (or glue if preferred) is added to the feather. The clamp is then fed into the slots in the vertical supports and gently pushed down until the feather touches the shaft. With the adhesive gripping, the clamp can be gently pulled back leaving the feather behind.
The dial can be turned and the process repeated until all feathers are in place. When finished, the plugs are pulled from either end and the arrows simply pulls free of the jig.
How To Make The Fletching Jig
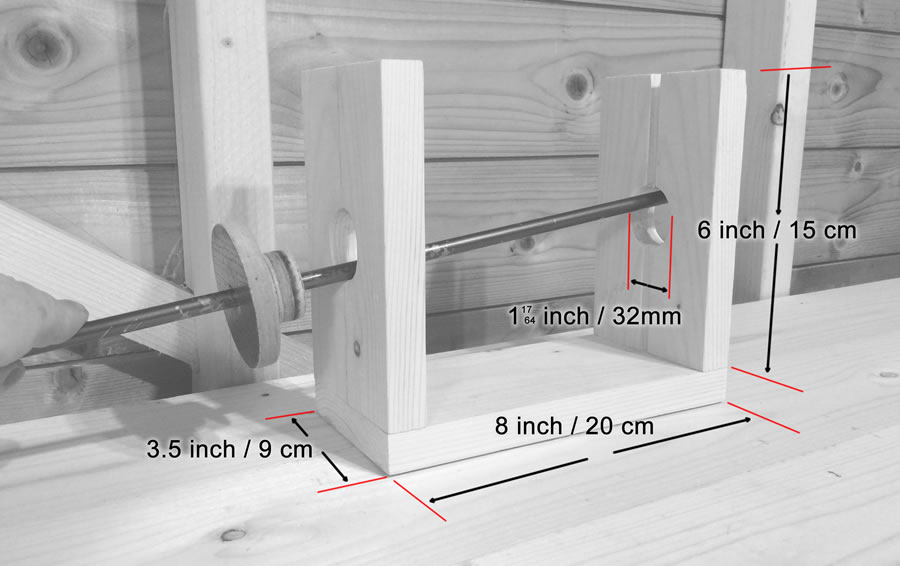
Let’s begin with some dimensions. I've recorded here the size of my jig but this should be seen as a guide. The jig determines what size feather you can use, so you can adapt the jig dimensions to suit your needs.
These dimensions are not compulsory. Adapt the jig to suit the size of the feathers that you prefer.
Wooden Framework
The main structure is wood and you could use timber, MDF or plywood. I used timber, roughly 18mm (3/4 inch) thickness and around 9cm (3.5 inches) wide. I cut uprights at 15cm (6 inch) and a base board at 20cm (8 inch).
The two vertical uprights will need a central slot in them for the clamp to slide down, so before trying to make any slot it's practical to build the clamp first.
Fletching Clamp
I can’t take credit for the clamp. I got the idea from Backyard Bowyer, a truly knowledgeable YouTuber who I strongly recommend you look up.
It begins with a piece of plastic pipe. If you’re in America like Backyard Bowyer, then Schedule 40 is a likely choice. If you’re a UK guy, you’re looking for the hard, solvent-weld type plastic. The idea is to heat this using an ordinary electric paint-stripping gun. Keep the gun moving constantly and work in a well-ventilated area. If you can smell the plastic, you're over-heating it.
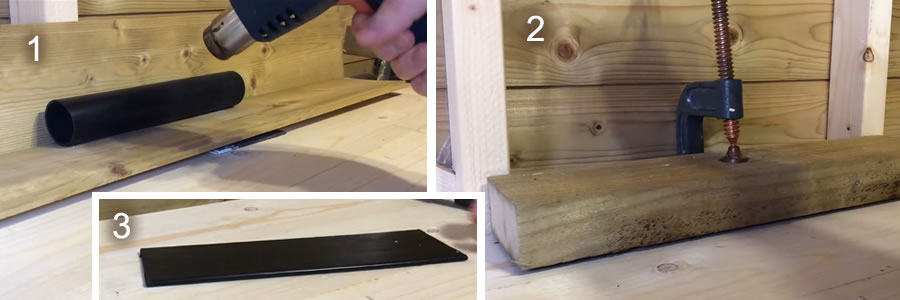
(1) PVC pipe heated with an electric paint-stripping gun (2) Softened pipe flattened and clamped to cool (3) Result - flat two-sided plastic
As the pipe gets hot, it softens and becomes pliable. At that point, acting quickly, flatten then pipe or clamp in beneath a solid length of timber and leave it a couple of minutes to cool.
The flattened plastics now needs to be turned into a feather clamp and to take a thin slice from the one edge, just a few millimeters (1/4 inch) will do. It's then reheated gently until the plastic just starts to open up. I then inserted a couple of pieces of cardboard that were roughly the thickness of a feather, then clamped it until it was cool once more.
When this has cooled, it's sanded to ensure it's flat and smooth and now it's thickness can be measured so the slot can be cut.
Getting Groovy
I have a table saw and this made light work of cutting central slots along the length of the two uprights (one side only, approx 6mm / 1/4 inch deep), though a router or circular saw could do as good a job.
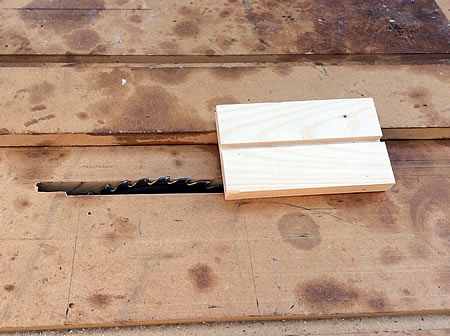
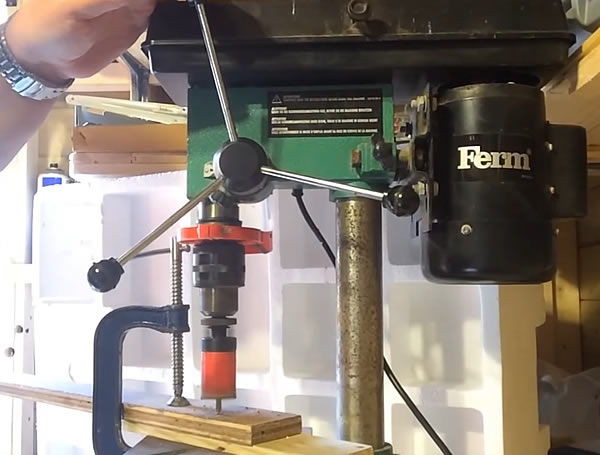
Plugs
To make the plugs, I used a couple of different size hole saws in my drill press and cut some holes from a piece of scrap plywood. It's not the hole I'm interested in here as much as the core - the circular piece left inside the hole saw.
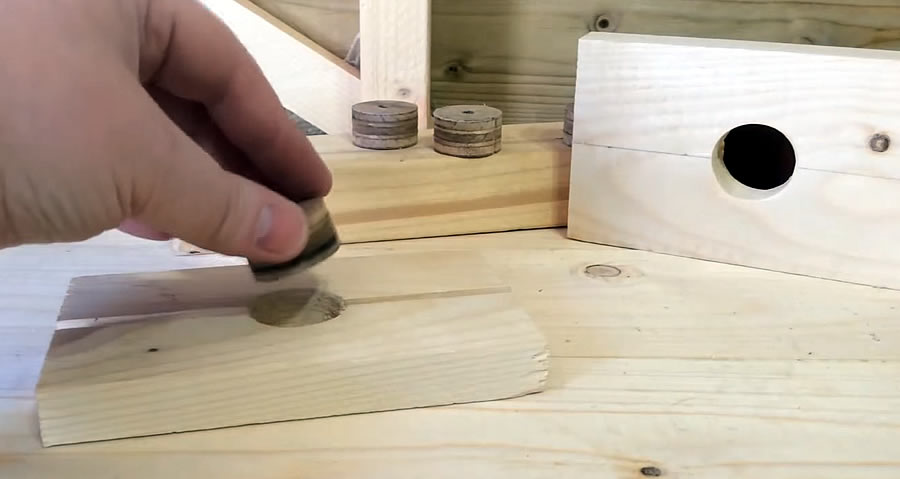
It doesn't matter what size hole saw you use, but ideally you want the core you've produced to fit snugly into a hole drilled dead-centre of the vertical support.
A hole is drilled in the centre of each upright and the core-plug should fit snugly (not loose) inside this hole
The core / plug should fit snugly. If it’s slightly loose, wrap a little tape around it. If it’s too tight, sand it very lightly.
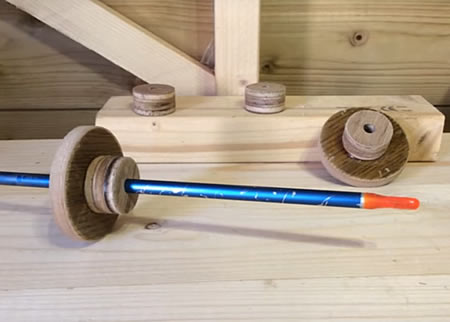
I did of course say I drilled two different sized cores. One large and one small make a pair and these can be glued together. Aligning carefully, drill a central hole that corresponds with the thickness of your arrow. If you use multiple sizes of arrow, you'll need a plug for each size.
Assembly
The two uprights are glued and screwed in place with the slots facing inwards. The clamp should be cut to length so that it slides freely down the slot without any slack.
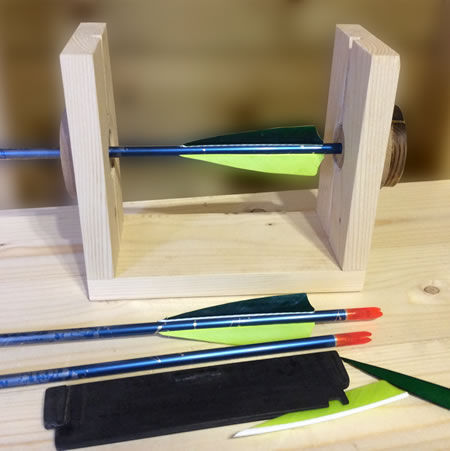
An arrow can now be fed into the jig with the nock projecting out past the end.
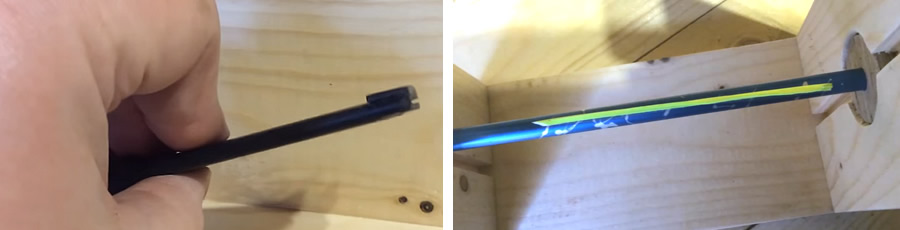
(1) An arrow is inserted into the jig with the nock projecting past a plug (2) A piece of strong plastic is shaped to fit the nock (3) The plastic is glued to the plug and supported. This forms the dial.
A thin piece of plastic is shaped and sanded to fit nicely into the nock and glued to the large plug - taking care not to get any glue on the nock. Wooden supports with more glue are added to hold the plastic firmly and creating the finished dial.
I drew some markings on the dial according to how I fletch my arrows (three feathers in my case). It’s just a matter of angles. I marked cock feather as 0 top centre, then sixty degree left and right for the hen feathers, but mark according to your needs.
Refining The Clamp
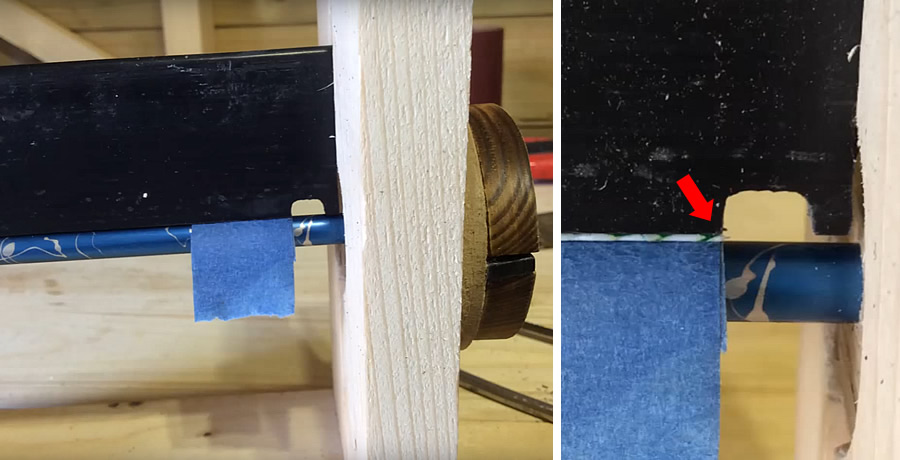
I like my feathers to be around an inch (25mm) from the nock, so I marked this position on the arrow with a little tape. I then marked the clamp with a pencil where it met the tape then filed away a small notch. This notch allows me to position the feather within the clamp so than when I glue my feather, they'll always be an inch from the nock.
Offset - If Required
I like to offset my feathers. So I glued a small piece of plastic on opposing ends of the clamp. It’s just a matter of millimeters, but it makes a nice difference. In my case the fletching has a right offset. That choice is yours.
And that's it. Obviously this jig works best on target arrows. If you wanted to use broadheads. you'd have to add a slot to one of the plugs, but it would still be possible I think.
If you want to see me making this jig on video, there's a video link below:
“We rise by lifting others” - Robert Ingersol
If you'd like to offer a donation (and help me fund a few new projects), then please click the donate button below. Payments are handled securely by PayPal. For more information on why I have this button, click here.
Or... Become A Patron
Alternatively, if you can spare a little each month, consider becoming a Patron. Patron's make it possible for me to continue developing my YouTube Channel and my websites. Please CLICK HERE for more information.
 I'm no champion archer, but I do enjoy a spot of archery and like to feather my own arrows. There’s plenty of fletching jigs out there on the Internet but none with quite my spin on things (forgive the pun).