Probably the most dangerous things about melting metals in a home made metal foundry is pouring the molten metals. I've seen terrifying videos of guys clumsily pinching the edges of their crucible with pliers or bits of wire and these really make me cringe. The possibility of a very dangerous accident is very real.
Given this I decided to make a crucible cradle to make things safer. This is just a metal cage that surrounds the crucible, and when dealing with lower temperature metals it really improves handling.
Advantages Of A Cradle
There's more than one reason to make a crucible cradle:
A cradle can securely hold the crucible, preventing it from falling over and spilling its content
A cradle can enable handling at a distance from the body, putting more safety room between you and scolding metal
A cradle can make pouring easier by improving handling precision
If designed correctly, the cradle can ideally position the crucible within the foundry. By suspending the crucible, for instance, it allows for heat to reach the bottom of the crucible as well as the sides, resulting is quicker and more even melts.
Cradle Design
One design does not fit all I'm afraid, so here I can only describe my crucible and cradle. I hope by so doing I can at least give you a few ideas for things to incorporate into your own build.
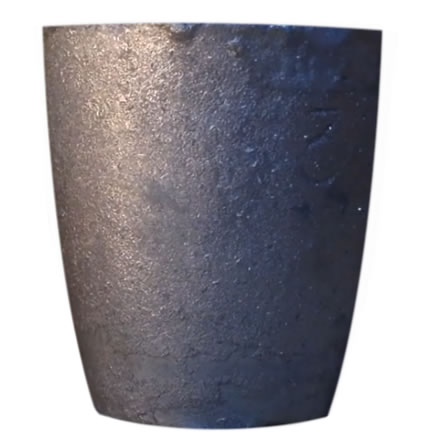
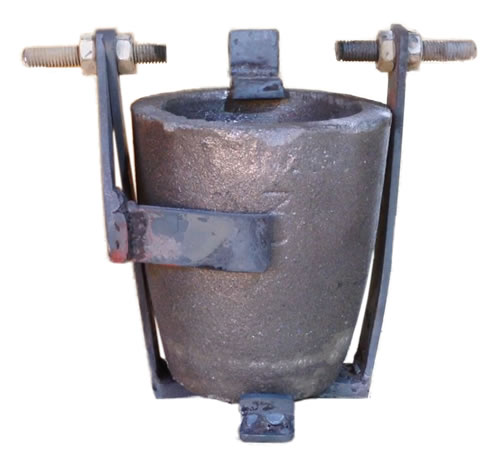
My crucible - bought cheaply on eBay
The sides of my cradle are curved which didn't make creating a frame of some sort an easy option, but it had to be done.
Flat Bar Steel
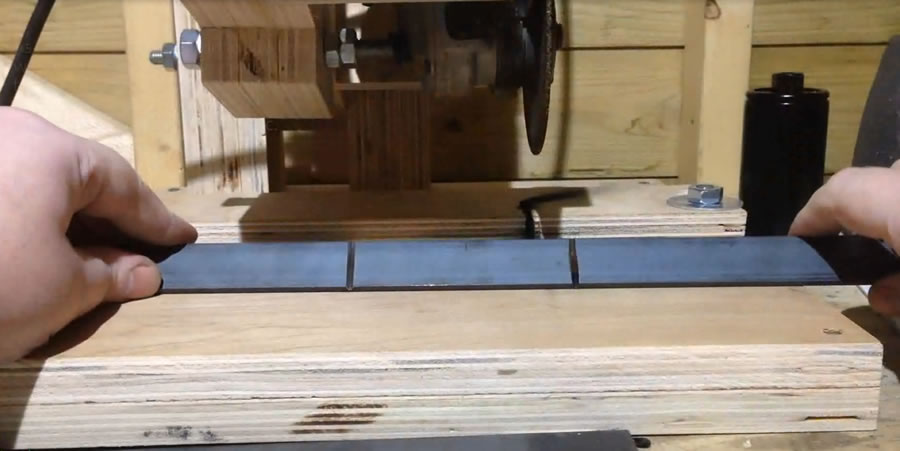
I took some flat bar steel and cut it roughly to fit the shape of my crucible, leaving a little extra for trimming later. Using my angle-grinder stand, I was able to make nice straight cuts. It was also nice and easy to lightly score either side of where I wanted to bend the steel.
Flat bar steel easily cut and scored using my angle grinder stand
Clamping the steel it in the vice and tapping gently it lightly took care of the bends, which folded over easily where I'd scored the metal. But this weakened the steel so it was then necessary to reinforce the bends with welds.
Virgin Welder
This was the first time I’ve ever done any welding, so no laughing at my ham-fisted attempts please. We’ve all got to learn – and I’ve clearly got a LOT to learn about welding…
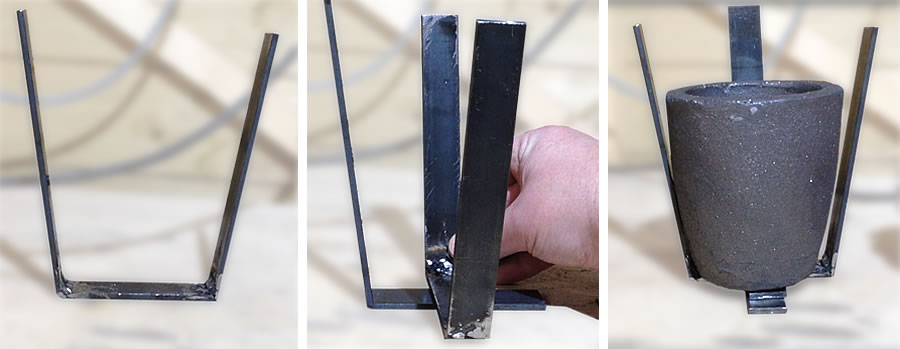
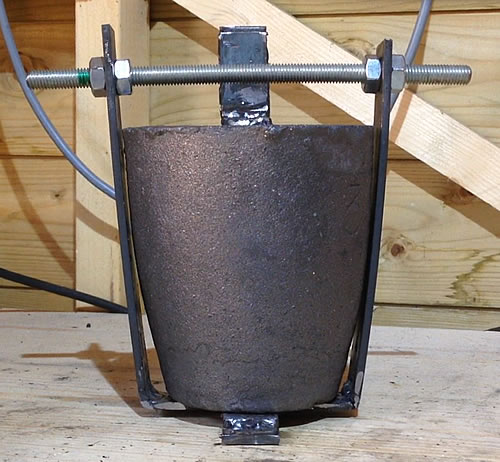
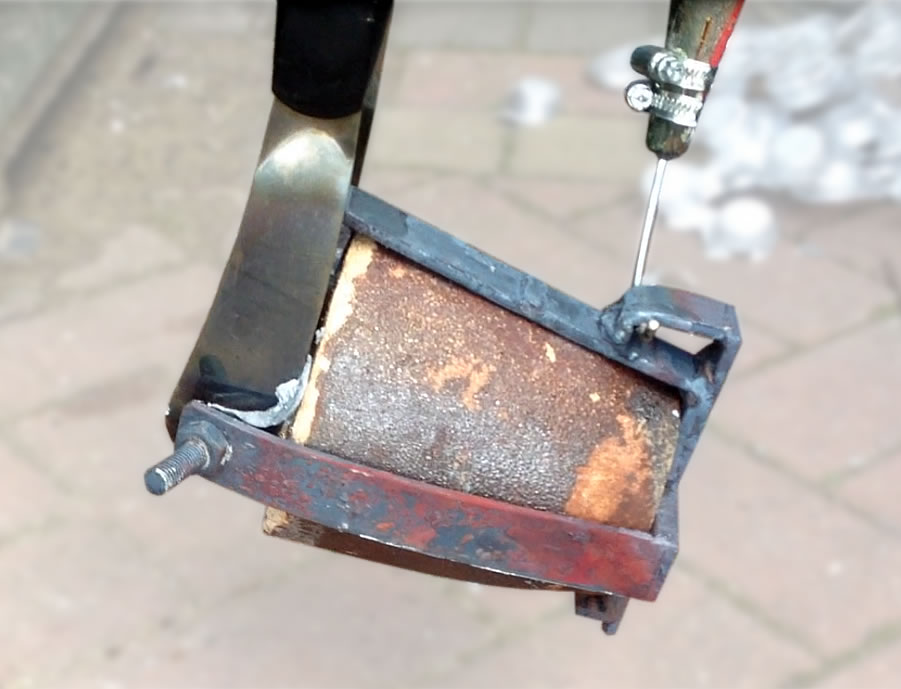
I didn't want to fully enclose my crucible, so I initially made a U shape and then an L shape, scoring the metal, bending it and welding the score bend. This created three fingers to secure most of the crucible.
1) U Shape fitted on to... 2) an L shape which creates... 3) three fingers
I doubled up the steel on the bottom to make a level surface for the crucible to stand on.
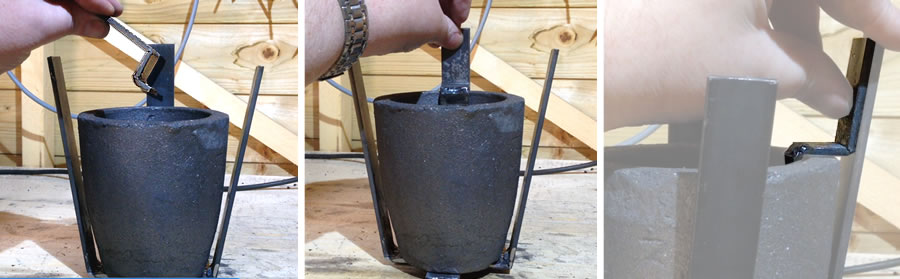
To help secure the crucible within the frame, I made a small hook to rest on the upper rim of the crucible.
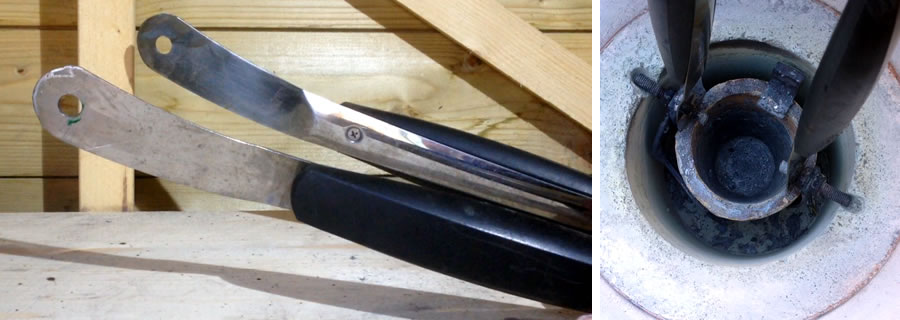
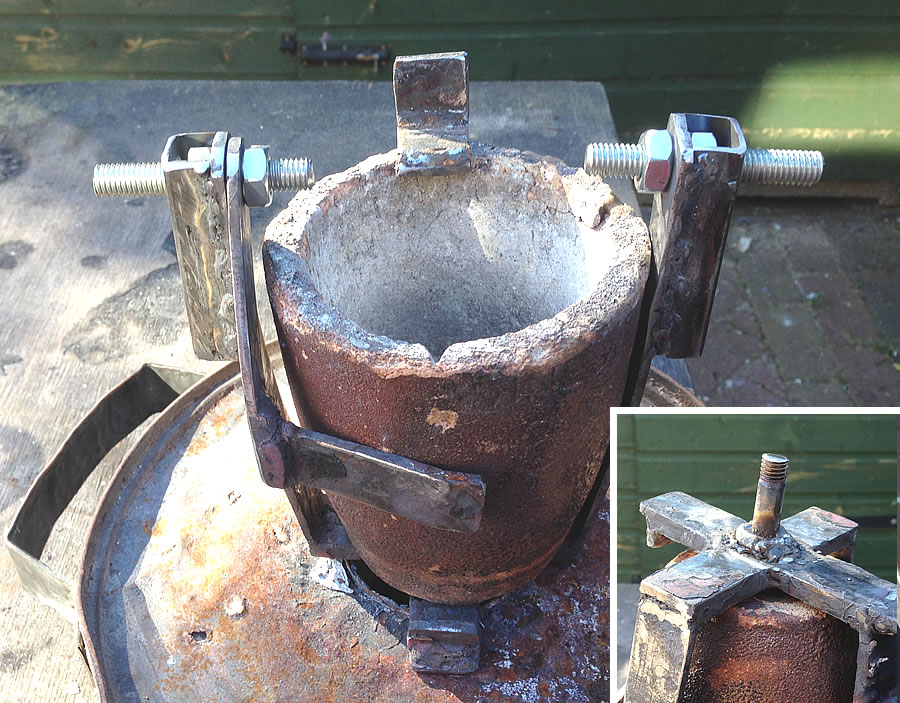
I wanted to suspend the crucible so I needed something for the cradle to swing from. I already hand some 10mm threaded rod handy so I opted for that.
After a couple of holes were drilled into two of the fingers, four nuts squeezed the steel sides in just a little.
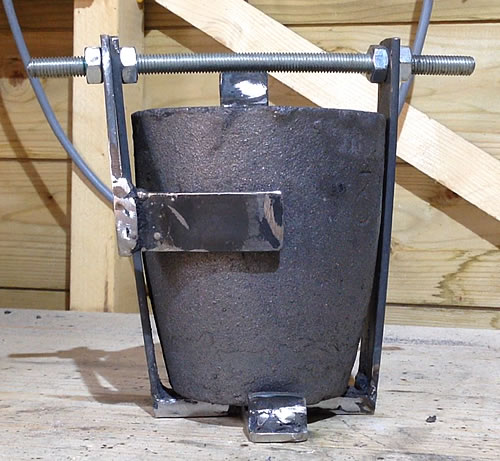
The hook was doing a fair job of holding the crucible, but it wasn't ideal. I then had the idea of a swing arm that could be held in place with the existing steel nuts. After a bit of terrible welding, I came up with something that I thought would work nicely. I also added a small upright at the bottom to prevent the crucible sliding forward and then cut away all the excess metal.
I must confess at the point, the swing arm was originally a double-sided affair. Unfortunately due to poor planning on my part I found it it wouldn't fit in my foundry - d'oh! Fortunately cutting away one side of the arm still left the crucible firmly gripped and enabled everything to slide nicely into the foundry... phew.
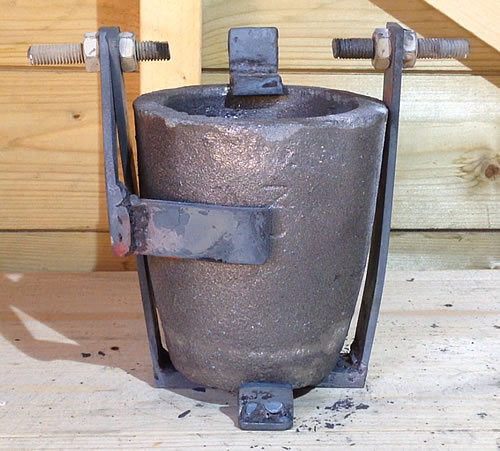
With the cradle resting on the foundry I was able to work out where I could cut some slots for the cradle to rest. I used some strips of tape to mark the locations and careful use of a masonry drill helped me carve out two shallow slots.
Annealing
Obviously the threaded rod at the top of the cradle makes it difficult to feed the crucible. But at this stage the steel in the cradle was under tension from the nuts… not a lot, but if I'd cut the threaded bar the sides were likely to spring out more than I wanted. This meant the metal had to be annealed.
Annealing is simply the application of heat to reduce the internal tensions within metal. So I placed the crucible and cradle into my foundry and heated it until the steel was glowing. I allowed the steel to cool naturally, then repeated the process a couple more times.
The following day the crucible wasn’t looking any worse for wear. The welds had all held and the metal tarnished, as expected. I cut away a large section of the threaded rod and the sides did ease out a little I think, but not much.
Loop
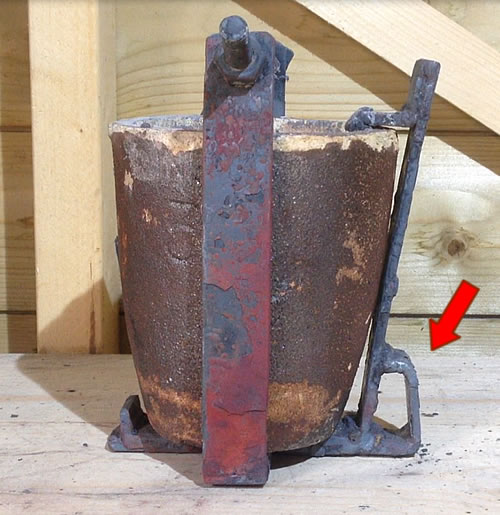
One thing I haven't mentioned until now is a small loop that I added to the third finger. This loop helps with the control side of things as you'll see in a moment. I originally placed roughly a quarter of the way up, but I later decided that placing the loop at the bottom gave increased control. That meant cutting cutting and grinding one away to replace it with another.
You can see this control loop in the above image and it should be fairly obvious that the crucible and cradle are a lot older at this stage... that's why I avoided mentioning it until now so that the inconsistency of the images didn't cause too much confusion.
Tilt Tools
To life the cradle in and out of the foundry and to tilt (pour) with control, I needed to create some simple tools.
To lift the cradle in and out of the foundry, I made use of old barbeque tongs. I simply rounded the ends with my angle grinder then drilled a hole in each tong just a little bigger than the threaded rod. The spring within these tongs means the always want to be open which allows then to capably latch on to the threaded rod.
Barbeque tongs make a great grab and tilt tool.
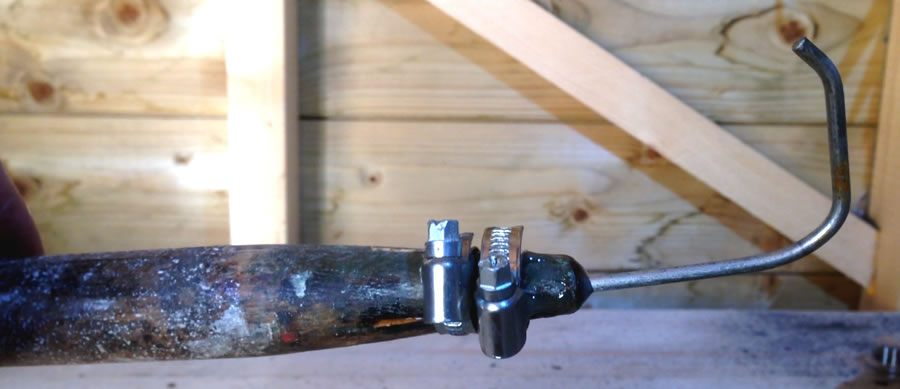
For the tilting arm, I took some thin steel bar and bent it in my vice. I notched some grooves with my angle grinder to help adhesive grip it better.
I drilled a hole in an old wooden broom handle, but the bit is a little too large. To reduce the slack, I cut two opposing slots across the hole to make a crude wooden chuck. Afterwards I mixed up a strong two part epoxy adhesive and squeezed this throughout the hole and slots.
Half a length of broom handle with a L shape metal bar make a simple control arm.
I added a couple of jubilee clips to squeeze the wooden fingers together, gripping the bar in place. It held a treat.
In use the cradle really does make for a more controlled and safe pour.
Update
After several outings the cradle was still good and strong but it was clearly sagging under the heat. Initially it functioned fine, despite its droopy appearance, but eventually it fell from the slots back and could no longer be suspended.
The cause of this sagging is a combination of the heat making the steel pliable and the weight of the molten metal adding weight which created a downwards force.
Had angle iron or perhaps a circular frame been used instead of flat bar, the cradle may have stood up better to the demands. It's certainly something to think about when building your cradle.
To remedy this, I cut away the treaded rod, removed the crucible, then ground a few shallow slots into the supporting arms of the cradle, weakening the metal enough for me to be able to straighten it. I filled these slots with weld then I welded some U channel steel to each support, effectively creating a box section.
I replaced the steel rod with new.
To compensate against the weight of the molten metals, I welded a bolt to the bottom of the cradle. This was trimmed to just skim the floor of the foundry. Thus the cradle is suspended in the slots as normal, but this bottom bolt helps carry some of the load, hopefully preventing sagging whilst leaving plenty of room for the heat to circulate beneath the cradle.
I'll keep you posted on how these modifications hold up.
Cool video. Alot of improvements that I was looking for. You sir earned yourself a lifetime subscriber.
“Being generous of spirit is a wonderful way to live” - Pete Seeger
If you'd like to offer a donation (and help me fund a few new projects), then please click the donate button below. Payments are handled securely by PayPal. For more information on why I have this button, click here.
Or... Become A Patron
Alternatively, if you can spare a little each month, consider becoming a Patron. Patron's make it possible for me to continue developing my YouTube Channel and my websites. Please CLICK HERE for more information.
 Probably the most dangerous things about melting metals in a home made metal foundry is pouring the molten metals. I've seen terrifying videos of guys clumsily pinching the edges of their crucible with pliers or bits of wire and these really make me cringe. The possibility of a very dangerous accident is very real.